Why Seasoning Matters
If you want to understand how to season a cast iron pan, start with the reason seasoning exists. Cast iron is durable and versatile, but bare iron can react with moisture and food, which is why a protective layer is so important. Seasoning is the process of building that layer by coating the pan with a very thin film of oil and heating it so the oil bonds to the metal surface.
That bonded layer does more than help prevent rust. It also creates a smoother cooking surface that can make everyday tasks easier, from frying eggs to browning vegetables. For many home cooks, seasoning is part of what makes cast iron feel like a long-term kitchen staple rather than just another pan.
It helps to think of seasoning as maintenance, not a one-time fix. A well-cared-for cast-iron pan can improve over time as the surface develops with regular use and proper cleaning. The goal is not a thick coating or a glossy finish that looks perfect on day one. The goal is a thin, even, protective layer that supports everyday cooking.
New pans and older pans often need the same basic approach, but the starting point may be different. A brand-new pan might have a factory coating or a light preseasoned layer, while an older pan may need cleaning before seasoning. In both cases, the central idea stays the same: clean metal, thin oil, heat, and repetition when needed.
What You Need Before You Start
You do not need special equipment to learn how to season a cast iron pan. A simple setup is usually enough, which is part of the appeal for family kitchens that value practical tools. Gather the pan, a small amount of neutral cooking oil, paper towels or a lint-free cloth, and an oven or stovetop method for heating.
Neutral oils are often preferred because they are easy to apply and commonly used in the kitchen. The exact oil is less important than the technique: use just enough to coat the surface very lightly. A heavy layer can leave the pan sticky rather than well-seasoned.
You may also want a sheet pan or foil-lined rack if you are using the oven. This can catch any drips and make cleanup simpler. If your pan has a handle or accent pieces that get hot, remember to use oven mitts and handle it carefully.
Before seasoning, inspect the pan for buildup, rust, or residue. A clean surface gives the oil a better chance to bond. If the pan has been stored for a while, or if it looks dusty and dull, a quick cleaning step is usually worthwhile before you move to the oil and heat.
Step 1: Clean and Dry the Pan
The first practical step in how to season a cast iron pan is cleaning. The pan should be free of food residue, grease, and loose rust before you begin. Wash it with warm water and a small amount of mild soap if needed, then rinse well. If there is stubborn residue, use a non-abrasive scrubber so you do not damage the surface.
Once the pan is clean, dry it thoroughly. Cast iron should not be left damp, because moisture can lead to rust. You can towel-dry it first, then place it over low heat for a few minutes to help remove any remaining water from the surface and crevices.
This drying step is especially useful if your pan has a textured interior or if it has been washed recently. Even a small amount of hidden moisture can interfere with the seasoning process. A completely dry pan gives you a better base for the oil layer and helps the seasoning adhere more evenly.
If your pan already has a seasoned surface but looks uneven or worn, you still want it clean and dry before adding more seasoning. Think of this step as setting the stage. The more even the starting point, the more consistent the result is likely to be.
Step 2: Apply a Very Thin Layer of Oil
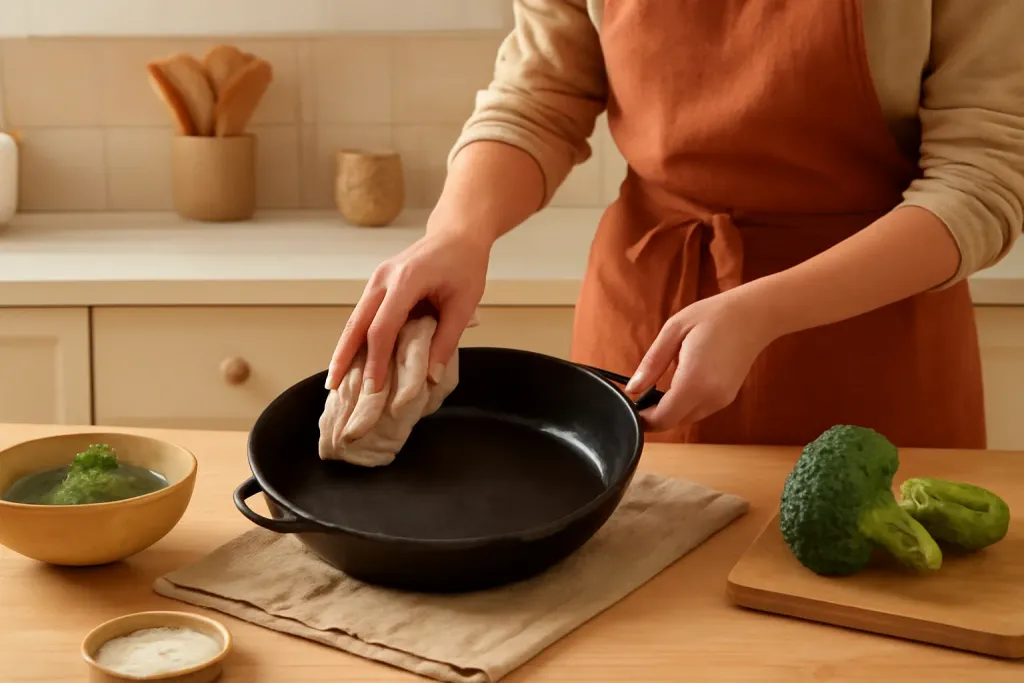
The most important detail in how to season a cast iron pan is oil quantity. More is not better. Use a small amount of oil and spread it over the entire pan, including the cooking surface, outer sides, handle, and rim if you want protection there too. Then wipe away as much as possible so only a very thin film remains.
Seasoning works best when the oil layer is nearly invisible. If you can see pools, streaks, or a shiny wet coating, there is probably too much oil left on the pan. A thin layer has a better chance of bonding into a smooth seasoning layer during heating.
You can apply the oil with a folded paper towel or cloth, then use a fresh towel to remove the excess. Be careful not to miss the edges and corners, where bare spots can lead to uneven seasoning. At the same time, do not let oil collect in the handle area or drip off the bottom.
It is easy to assume that a thicker coat will protect the pan better, but cast iron seasoning is built through thin applications. If the first coat is too heavy, it may become tacky or uneven. A careful, almost dry-looking finish is usually the better choice.
Browse our recommended picks
Our featured picks refresh periodically. While we update them, our editorial guides can help you find the right one.
See our guidesStep 3: Heat the Pan to Bond the Oil
After oiling, the next part of how to season a cast iron pan is heat. Heating transforms the oil from a simple coating into a more durable layer on the metal surface. Many home cooks use an oven for even heating, while others prefer a stovetop method for shorter sessions. Either approach can work if you keep the layer thin and heat the pan long enough for the oil to bond.
If you use the oven, place the pan upside down on a rack with a tray or foil below to catch any excess. This helps prevent pooled oil from settling on the cooking surface. If you use the stovetop, keep the heat moderate and move the pan carefully so the seasoning develops evenly.
The exact time and temperature can vary by method and oil type, but the principle remains the same: you want sustained heat, not scorching. The pan should be heated long enough for the oil to polymerize, which is the process that creates the seasoning layer. If the heat is too low, the layer may not set well. If it is too high, you may get smoke or uneven results.
Good ventilation is helpful whenever heating oil. A little smoke can happen during seasoning, so open windows or use a range hood if available. The purpose is to create a controlled heating environment, not to rush the process.
Step 4: Cool, Inspect, and Repeat if Needed
Once the pan has finished heating, turn off the heat and let it cool gradually. Sudden temperature changes are not ideal for cast iron, so avoid putting a hot pan under cold water. When the pan is cool enough to handle, inspect the surface. A successful seasoning layer may look slightly darker and feel smoother than before, though it may not look perfect after one round.
If the surface appears patchy, dull, or sticky, that does not necessarily mean something went wrong. It may simply need another thin coat and another heating cycle. Learning how to season a cast iron pan often involves repetition. Several light layers usually work better than one heavy application.
Between rounds, keep the pan clean and dry. Repeat the oiling and heating steps until you are satisfied with the surface. There is no single universal number of rounds that fits every pan, because the starting condition, oil amount, and heating method can all affect the result.
Over time, regular cooking also contributes to the surface. When cast iron is used correctly and cleaned with care, seasoning can continue to develop naturally. That means your initial seasoning session is only the beginning of ongoing care.
Daily Care and Maintenance
After you learn how to season a cast iron pan, day-to-day care helps preserve the work you put into it. Clean the pan soon after cooking once it has cooled enough to handle. Use warm water and gentle scrubbing as needed, then dry it promptly. If you notice food sticking or the surface looking dry, a light wipe of oil after cleaning can help maintain the finish.
Storage matters too. Keep the pan in a dry place, and if you stack it with other cookware, consider placing a towel or pan protector between pieces so moisture and friction do not wear on the seasoning. If the pan is used regularly, you may not need to do a full seasoning cycle very often, but occasional touch-ups can be useful.
It also helps to avoid habits that strip the surface unnecessarily. Harsh scrubbing, long soaks, and leaving the pan wet can all work against seasoning. Cast iron does not need to be babied, but it does respond well to consistency. Gentle care makes the next meal easier and keeps the pan ready for family cooking.
If the pan starts to look uneven after frequent use, treat it as a maintenance cue rather than a problem. A quick refresh can usually bring it back into balance. With cast iron, small habits add up over time, and seasoning is one of the clearest examples of that.
Common Mistakes to Avoid
People often overcomplicate how to season a cast iron pan, but a few common mistakes are easy to avoid. The first is applying too much oil. Thick coatings are a frequent cause of sticky or blotchy surfaces, so always wipe away the excess. The second is skipping the drying step. Even a slightly damp pan can interfere with the process and encourage rust.
Another mistake is using too much heat too quickly. Seasoning benefits from steady heat that gives the oil time to bond. Extreme heat can smoke off the oil before it has a chance to form a useful layer. Likewise, not giving the pan enough time to cool can make handling difficult and may tempt you to rush the next step.
Some cooks also expect brand-new cast iron to look fully polished after a single round. In reality, seasoning is cumulative. A new or restored pan usually gets better with use, not instant perfection. Thinking of the process as gradual can keep expectations realistic and make the pan easier to care for over the long term.
Finally, avoid assuming that every dark spot is a problem. Cast iron seasoning often looks uneven at first, especially during the early stages. What matters most is a clean, dry surface with a thin protective layer that can continue to build as the pan is used and maintained.