Why Accurate Measuring Matters
Baking is more sensitive to measurement than everyday cooking because ingredients do more than add flavor. Flour builds structure, sugar affects browning and tenderness, fat changes texture, and leavening controls rise. When you are learning how to measure ingredients for baking, the goal is consistency: if the ingredients are measured the same way each time, the results are much easier to repeat.
Small differences can change how batter looks and behaves. Too much flour can make quick breads dry or dense, while too little can leave cookies spreading more than expected. Extra liquid may thin a batter, while too little can make it stiff. That is why many home bakers rely on simple measuring habits instead of guessing by eye.
Accurate measuring also helps family cooks follow recipes with confidence. Once you understand the basic method for dry, liquid, and sticky ingredients, it becomes easier to bake from week to week without wondering why one batch worked and another did not. The good news is that measuring well does not require professional equipment, only a few dependable tools and a consistent approach.
Basic Tools Worth Having
You do not need a large collection of gadgets to measure well, but a few simple tools make baking easier. Nested measuring cups are useful for dry ingredients such as flour, sugar, oats, and cocoa. Measuring spoons help with smaller amounts of baking powder, salt, vanilla, and spices. A clear liquid measuring cup with markings is important for milk, water, oil, and other pourable ingredients.
A kitchen scale is another helpful tool for home bakers who want the most consistent results. Many recipes now include weights because grams can reduce the variation that happens when flour is packed or scooped differently. For families who bake often, a scale can be especially useful when doubling recipes or making the same treat repeatedly.
Other practical items include a straight-edged spatula or knife for leveling dry ingredients, a whisk for aerating and breaking up clumps, and a set of bowls that gives you room to measure without spilling. If you shop for kitchen equipment as an affiliate reader, focus on ease of use, clear markings, sturdy construction, and a shape that feels comfortable in daily baking. Simple tools used consistently are usually more valuable than complicated ones used occasionally.
How to Measure Dry Ingredients
Dry ingredients are where many home bakers lose accuracy. The most common issue is packing or overfilling a cup. For ingredients like flour, powdered sugar, cocoa powder, and cornstarch, the best approach is usually to spoon the ingredient into the measuring cup and level it off. This helps avoid compressing the ingredient more than the recipe expects.
When measuring flour, first fluff it lightly in the container with a spoon or whisk. Then spoon it into the cup until it is mounded, and level the top with a straight edge. Do not dip the cup directly into the flour bag if you want more consistent results, because that often compacts the flour and can add extra weight. If the recipe uses grams, placing the bowl on a scale and adding flour until you reach the target weight is even more precise.
Granulated sugar is less prone to packing than flour, but it still should be filled and leveled carefully. Brown sugar is different because many recipes expect it to be packed firmly into the cup. If the recipe says packed brown sugar, press it in so it holds the shape of the cup when turned out. Other ingredients, such as shredded coconut, chopped nuts, and chocolate chips, should be measured by lightly spooning them in and leveling only if the recipe calls for a level cup. When in doubt, follow the wording of the recipe closely.
For ingredients that settle, like oats or grated cheese, stir before measuring so the cup is not missing part of the ingredient from the top. For very fine powders, work slowly and avoid shaking the cup, which can settle the ingredient and change the amount. Consistency matters more than speed here.
How to Measure Liquid Ingredients
Liquid ingredients should be measured in a clear measuring cup placed on a flat surface. Pour the liquid in, then bend down so your eye is level with the markings. Reading from above can make the amount look higher or lower than it really is. This simple habit can improve accuracy right away.
Use a liquid measuring cup for water, milk, juice, stock, oil, and other pourable ingredients. The lines are designed for volume, and the extra room at the top helps prevent spills. A dry measuring cup is not the best choice for liquids because it is harder to fill accurately without overflowing. For small amounts, measuring spoons may be the most practical option.
Some liquids are thicker than others, so let them settle before checking the line. Honey, maple syrup, molasses, and similar ingredients cling to the cup and can be tricky to pour. Lightly oiling the measuring cup first may help sticky ingredients release more easily, although that is only a convenience trick and not a substitute for careful measuring. If a recipe includes both dry and liquid measures, read it through before starting so you can choose the right tool for each ingredient.
It also helps to remember that many baking recipes are designed around exact liquid amounts. A small difference in milk or water can affect the feel of batter, especially in cakes, muffins, and quick breads. Measuring on a level counter, at eye level, is one of the easiest ways to avoid that problem.
Browse our recommended picks
Our featured picks refresh periodically. While we update them, our editorial guides can help you find the right one.
See our guidesUsing a Scale for Better Consistency
A kitchen scale is one of the clearest answers to the question of how to measure ingredients for baking more accurately. With a scale, you weigh ingredients instead of relying on cup volume, which can vary from one cook to another. This is especially helpful for flour, nuts, chocolate, butter, and other ingredients where a cup measure can be less exact.
To use a scale, place a bowl on the platform and zero it out, a step often called tara or tare. Add the ingredient until the display reaches the amount listed in the recipe. If you are adding several ingredients to one bowl, you can tare again after each one. That makes prep easier and reduces the number of dishes.
Weights are especially useful when a recipe provides both cups and grams. If the gram amount is included, it is usually the most reliable choice. That can help when you are baking cookies for the family, making sandwich bread, or preparing a cake where texture matters. It also helps when you want to halve or double a recipe, because the math is more straightforward with weights.
There is no requirement to replace cups entirely, and many home bakers still use both systems. The main point is to know when a scale will improve consistency and when a simple measuring cup is enough. If you bake frequently, a scale can become one of the most practical tools in the kitchen.
Common Measuring Mistakes to Avoid
One of the biggest mistakes is scooping flour directly from the bag with the cup. This tends to pack the flour and can add more than the recipe expects. Another common issue is ignoring the difference between packed and level measurements. Brown sugar is often packed, but flour usually is not. Reading the recipe carefully prevents a lot of confusion.
Shaking or tapping a measuring cup can also change the amount, especially for flour and powdered ingredients. It may seem like a quick way to settle the cup, but it can compress the ingredient. Instead, fill the cup and level it once. For liquids, the mistake is often checking the measurement from the wrong angle or using the wrong kind of cup.
Many bakers also overlook ingredient temperature and texture. Softened butter should be soft, not melted, if a recipe expects it to be creamed with sugar. Cold ingredients, sticky ingredients, or clumpy ingredients can all affect how accurately they are measured if they are not prepared first. Sifted flour, for example, takes up a different volume than unsifted flour, so follow the recipe wording closely when sifting is mentioned.
Finally, avoid guessing when recipes use small amounts. A teaspoon of baking powder, a half teaspoon of salt, or a quarter teaspoon of spice can make a noticeable difference. Measuring spoons are there for a reason, and using them carefully helps protect the balance of the whole recipe.
Simple Tips for Family Baking Success
Family baking works best when the process is simple enough to repeat. Start by reading the entire recipe before gathering ingredients. That helps you see whether you need cups, spoons, a scale, or a mixture of tools. It also gives you time to soften butter, bring eggs to the right temperature for the recipe, and prepare pans before mixing begins.
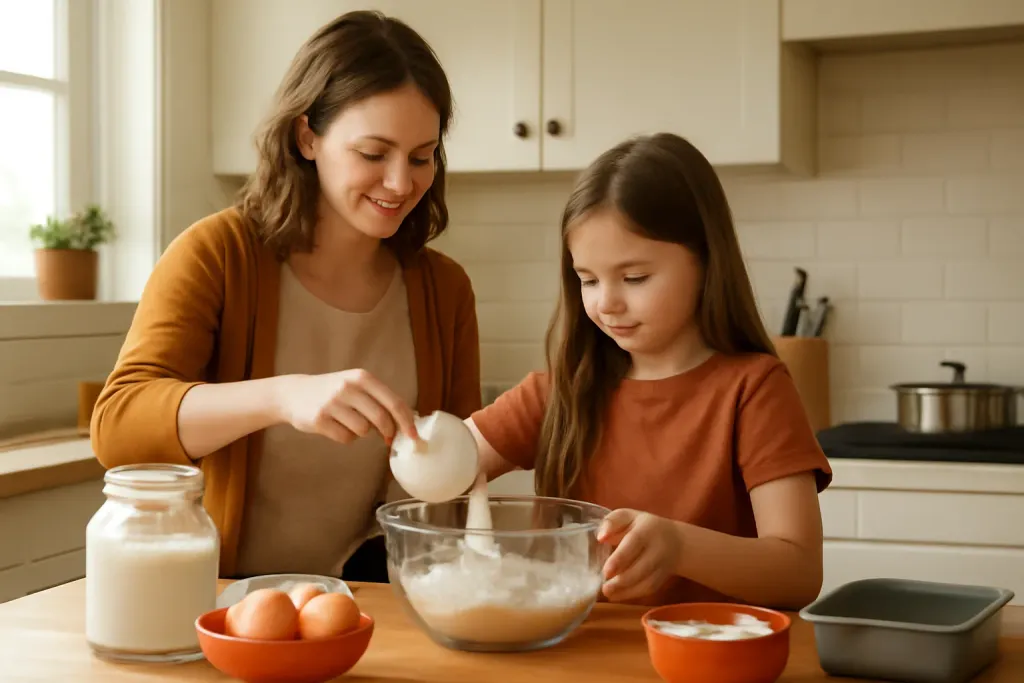
Set up ingredients in order and measure one item at a time. This reduces mix-ups and makes it easier for children or helpers to stay involved. If little hands are helping, give them straightforward jobs such as leveling cups, adding premeasured ingredients, or stirring the dry mixture. Keep the most precise steps for an adult, especially when leavening agents or salt are involved.
Label your dry ingredients clearly if you store them in containers. Flour, sugar, powdered sugar, and baking powder can look similar in a hurry, and a quick label can prevent errors. Clean measuring cups and spoons between ingredients when needed, especially if you are moving from wet to dry or from sticky to dry ingredients. A clean tool is easier to level and easier to read.
Most of all, be consistent. Use the same method each time you measure, whether you spoon and level, use measuring cups, or weigh by grams. Over time, that routine becomes second nature and improves the quality of everyday baking without making the process feel complicated.
Quick Reference for Measuring
A short checklist can help when you are in the middle of a recipe and do not want to stop and rethink every step. Use dry measuring cups for ingredients like flour and sugar, liquid measuring cups for milk and water, and measuring spoons for small amounts. Level dry ingredients with a straight edge unless the recipe says to pack them. Place liquid cups on a flat surface and read them at eye level.
When a recipe includes grams, consider using a scale for the most repeatable result. If an ingredient is sticky, thick, or uneven, take extra care to prepare it before measuring. If the recipe uses words like sifted, packed, heaping, or level, follow those instructions exactly because they change the amount in the cup.
The simplest answer to how to measure ingredients for baking is this: use the right tool, follow the recipe language closely, and measure the same way every time. That habit supports better muffins, cakes, cookies, breads, and everyday family bakes with less guesswork and fewer surprises.